Address
304 North Cardinal
St. Dorchester Center, MA 02124
Work Hours
Monday to Friday: 7AM - 7PM
Weekend: 10AM - 5PM
Address
304 North Cardinal
St. Dorchester Center, MA 02124
Work Hours
Monday to Friday: 7AM - 7PM
Weekend: 10AM - 5PM
Thunderobot EGER-E1 notebook cannot be started due to water ingress for repair
Machine model: Thunderobot EGER-E1
Processor: I3-10110 8G memory, 512G solid state, integrated graphics card
Edition number: 6-71-NL4C0-D02
Malfunction: Notebook water damage can’t be turned on.
Maintenance process: It’s a little scary to take a look at it after the quotation. There are many places at water damage, but other places are not too serious. What’s serious is the charging chip here. The water damage machine is always cleaned and looked at first.
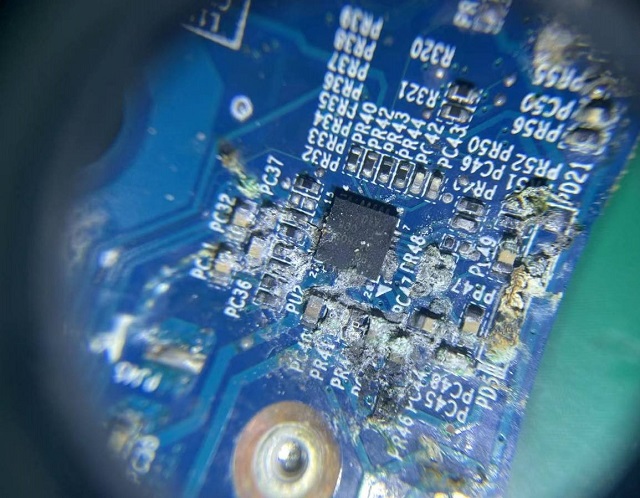
Thunderobot EGER-E1 notebook cannot be started due to water ingress for repair Figure 1.
While brushing, my heart is cold, and the things on it clatter off with the brush. This is already a partial picture.
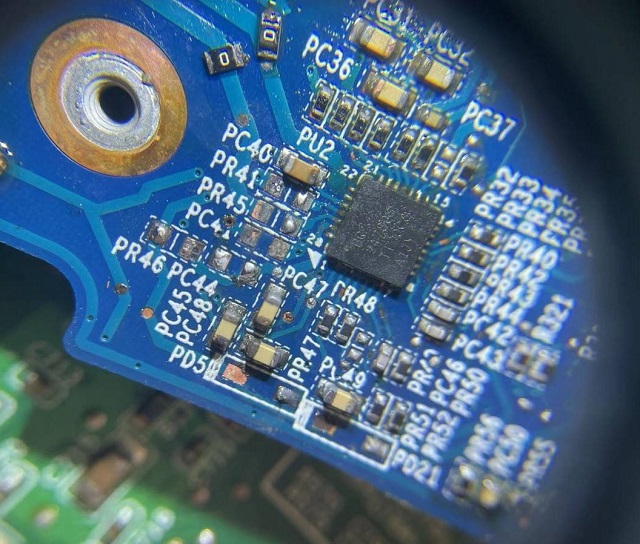
Thunderobot EGER-E1 notebook cannot be started due to water ingress for repair Figure 2.
water damage has many points, other places are not too serious, but the serious one is charging the chip here. The water damage machine always washes and looks at it first. While brushing, my heart is cold, and the things on it clatter off with the brush. This is already a partial picture.
Everything else is easy to say. These resistors almost made me cry. Without resistors, take multimeter and look for it on Parts motherboard. 4.02K, 2.2Ω, 10K, 76.8K, 470K, etc. Finally, the resistor was fixed, and it was found that BST Capacitor was gone.
This can’t be changed casually. It is found from the drawing that the capacity of BST Capacitor is 0.047U, so I found a piece of Parts motherboard to find the drawing, and compared it to the board, removed it and made it up.
It took almost more than an hour to finally make up all the corrode pieces that were visible to the naked eye on the board. Holding a magnifying glass, I observed that the charging chip corrode was not serious, but the 27 corrode was a little black. In order to be safe, I went over the Flux TC 1801 again (lazy and didn’t take it off and re-weld it, so I immediately learned a good lesson later).
No abnormality was found at the common point and the major Inductor diode value, but the power-on standby 0000 was obviously not isolated by Current protection. Once again, the common poin diode value, no common point VCC and the isolation tube G without VCC were measured, so the working conditions of the charging chip were checked.
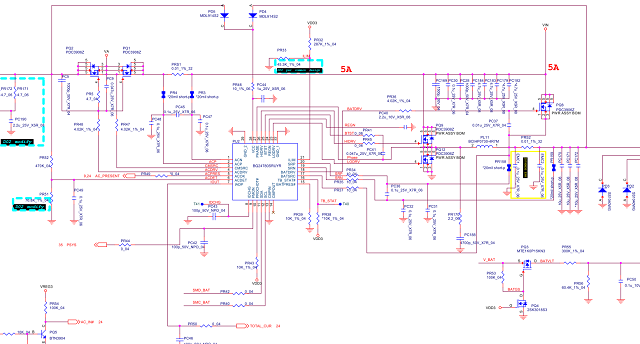
Thunderobot EGER-E1 notebook cannot be started due to water ingress for repair Figure 3.
The charging chip is BQ24780S, and VCC 28 pin VCC 0V is measured, which is definitely wrong. After careful investigation, PR46 is found to be disconnected, so fly a line to make it up. Once again, the power was turned on and standby came out, so did VCC, the measuring common point, and the standby 3V 5V. So the power was turned on, and the current ran happily.booting up was secretly pleased, which is good (as it turns out, I think too much).
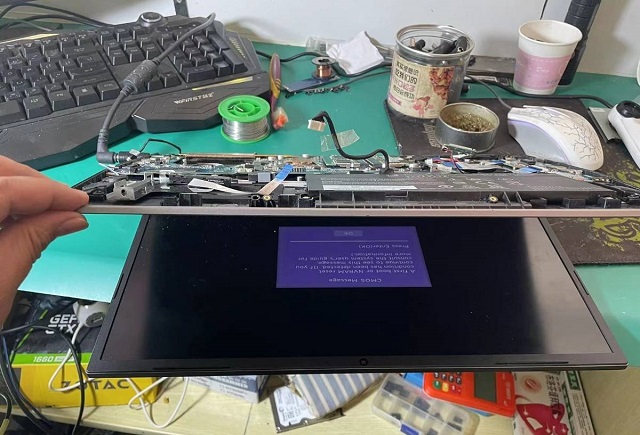
Thunderobot EGER-E1 notebook cannot be started due to water ingress for repair Figure 4.
As soon as I plugged in the power supply, I heard the sound of Current protection dripping, and I was stunned. Why did Current protection drop? I just started it. After careful consideration, there is no Current protection pool when I started it. I pulled out auto power off pool and started it into the system normally. When I put on the battery and plugged it in, I got Current protection. It seems that there are still problems.
Test battery interface Diode value is normal, test charging VCC 17V? Look at the battery charging limit VCC 13.8V, which is obviously wrong. Why does it output 17V VCC? The upper and lower charging tubes and battery isolation tubes are normal. Is the charging chip broken?
So I dried the charging chip, and when I removed it, I found that corrode Open was inside 27 pin(because I was lazy before, I didn’t take it off and solder it again). I quickly scraped off the corrode and soldered the charging chip again. After electrifying, I tested that the battery charged pin 0.2V, and the battery was not connected to corrode. However, when I entered the system, I found that the battery was not charged, and I could recognize it.
Check the working conditions of the rechargeable chip again. 1, 2, 3 pin 19V is normal, 4 pin ACDRV 24V is normal, 5 pin ACOK 0V is abnormal, 6 pin ACDET is normal, 24 pin RENG 6V is normal, 28 pin VCC 19V is normal, and this ACOK VCC is not out.

Thunderobot EGER-E1 notebook cannot be started due to water ingress for repair Figure 5.
The pull-up resistance Diode value is normal,VDD3 VCC also have 3.3V, but why doesn’t ACOK come out? Is the charging chip broken? I immediately changed a chip and found it was still the same.
Working conditions are normal, but there is no ACOK. This is a bit strange. After careful study of the drawings, it was found that this ACOK went to pull-up R397, and then entered the bridge and EC.
The measurement of EC82 pin is also 0. When I get here, I can’t help it. I can’t figure it out. I quickly asked my senior brothers in the group, carefully studied the charging chip, and found that ACOK came out and connected a 0 ohm resistor.
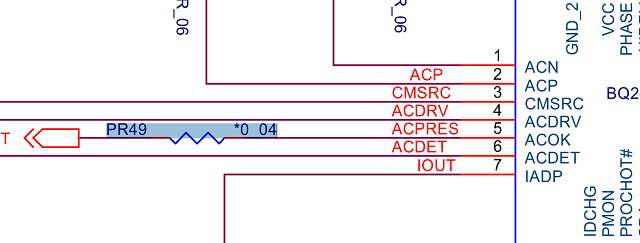
Thunderobot EGER-E1 notebook cannot be started due to water ingress for repair Figure 6.
But it wasn’t installed on the board. I thought it was a missing piece that wasn’t repaired, but it still didn’t work when one was repaired. Finally, I found an asterisk in front of the 0 ohm resistor in the drawing, indicating that it wasn’t installed. So my senior brother asked me to check the AC-IN#, and the low level of AC-IN# was normal. Here, my senior brothers made a guess.
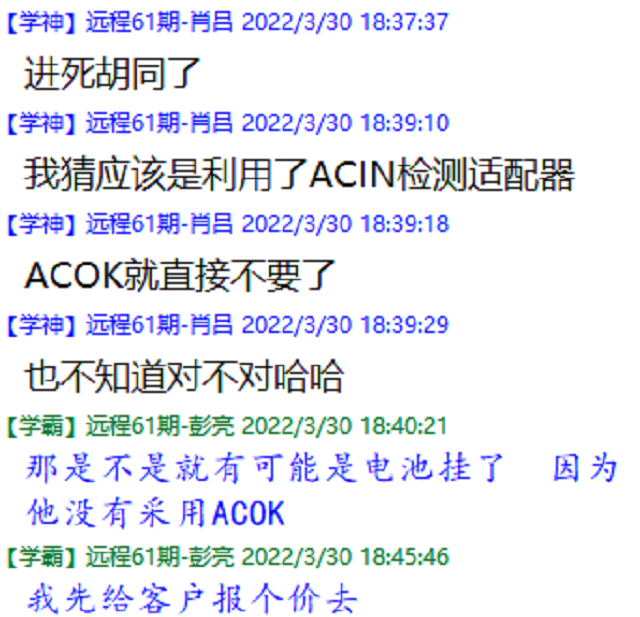
Thunderobot EGER-E1 notebook cannot be started due to water ingress for repair Figure 7.
It should be that this machine doesn’t use ACOK, so the 0 ohm resistance from ACOK on the drawing shows that it’s not installed, and the physical object has been confirmed many times that it’s not installed. It’s not that I didn’t make it up because of the missing parts.
Instead of ACOK, AC-IN# is directly used as the adapter insertion detection, so ACOK VCC 0V should be normal. The battery of this machine may be broken. After quoting to the customer, the customer stopped repairing it, so it was plugged in and used, so I couldn’t verify it.
Finally, thanks to Xunwei’s platform, I have the opportunity to continue learning. Since I signed up for Xunwei’s remote class, I have been able to do some simple circuit analysis since I was a rookie who didn’t know what a charging chip was. The charging chip I was most afraid of changing before can now be done in minutes.